Rainbow nails are indeed a fun and trendy choice for nail designs. If you’re interested in trying out some colorful and vibrant rainbow nail designs, here’s how you can go about it:
Materials you’ll need:
- Nail Polish: You’ll need a range of nail polish colors to create the rainbow effect. Make sure you have the colors of the rainbow: red, orange, yellow, green, blue, indigo, and violet.
- Base and Top Coat: To protect your nails and make your nail art last longer.
- Nail Art Brushes: Fine-tipped nail art brushes will help you create intricate designs.
- Nail Polish Remover and Cotton Swabs: These are useful for cleaning up any mistakes.
- Nail File and Buffer: To shape and prepare your nails.
Now, here’s a simplified way to create rainbow nails at home:
Step 1: Prepare Your Nails
- Start by removing any old nail polish and shaping your nails using a file.
Step 2: Apply a Base Coat
- Apply a clear base coat to protect your nails and create a smooth surface for the nail polish.
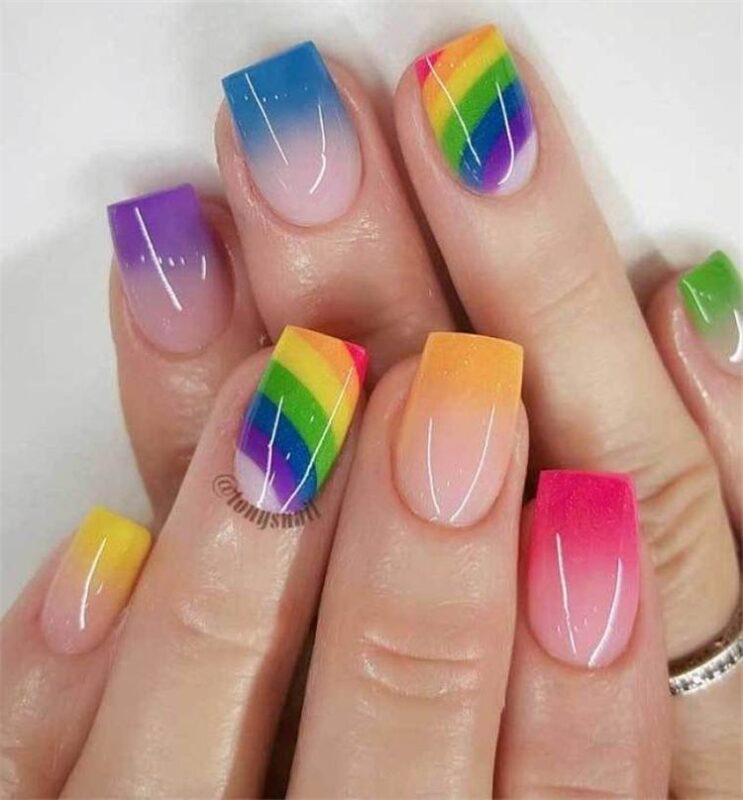
Step 3: Create the Rainbow Gradient
- To achieve the rainbow gradient, paint each nail with a different color from the rainbow spectrum. Start with red on your thumb, orange on your index finger, and so on.
- Use a makeup sponge or a nail art sponge to blend the colors together where they meet to create a seamless transition.
Step 4: Add Some Artistic Flair
- You can get creative with your rainbow nails. Add designs like clouds, raindrops, or even tiny rainbows to make your nails more unique.
- Use fine-tipped nail art brushes for precision.
Step 5: Apply a Top Coat
- Seal your nail art with a clear top coat to protect the design and give it a glossy finish.
Step 6: Clean Up Mistakes
- Dip a cotton swab or a small brush in nail polish remover to clean up any polish that may have gone outside the nail.
Step 7: Let Your Nails Dry
- Give your nails ample time to dry completely.
Remember that creating intricate nail art designs can take practice, so don’t be discouraged if your first attempt isn’t perfect. You can always start with simpler rainbow designs and work your way up to more complex ones.
If you find it challenging to do rainbow nails on your own, you can certainly explore stick-on nails and nail wraps from Etsy, as you mentioned in your post. They offer a convenient way to achieve beautiful and intricate designs without the need for advanced nail art skills.
Enjoy your rainbow nail art journey, and don’t forget to have fun with your creativity!